Install AutoRigging in Moho
First choose the version that matches your Moho installation, then install the AutoRigging folder directly from Moho. It only takes four steps.
Extract & Choose Your Version
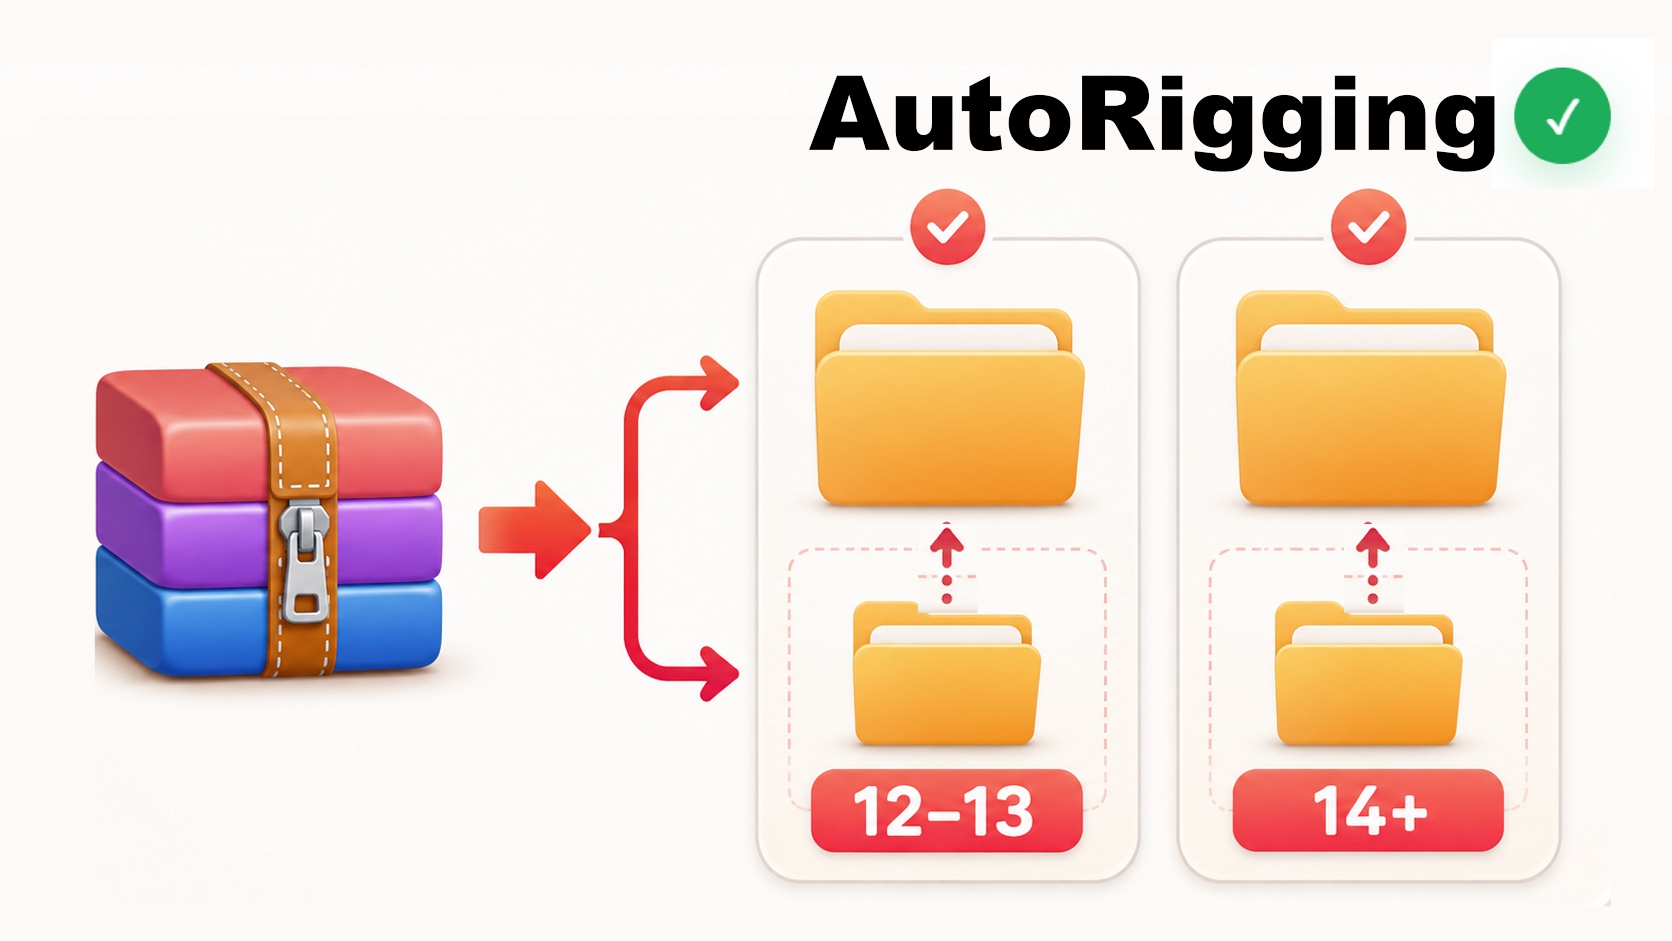
Extract AutoRigging.zip. Inside you'll find two folders. Choose the one that matches the version of Moho you're using.
After choosing your version, open that folder. Inside you'll find the AutoRigging folder that will be installed in Moho.
Open Install Script
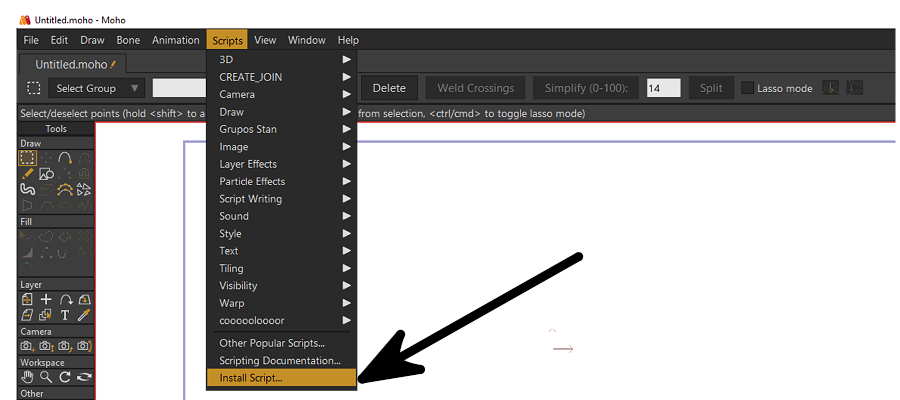
Open Moho. From the top menu, go to Scripts → Install Script…
A file browser will open so you can select the AutoRigging folder.
Select AutoRigging
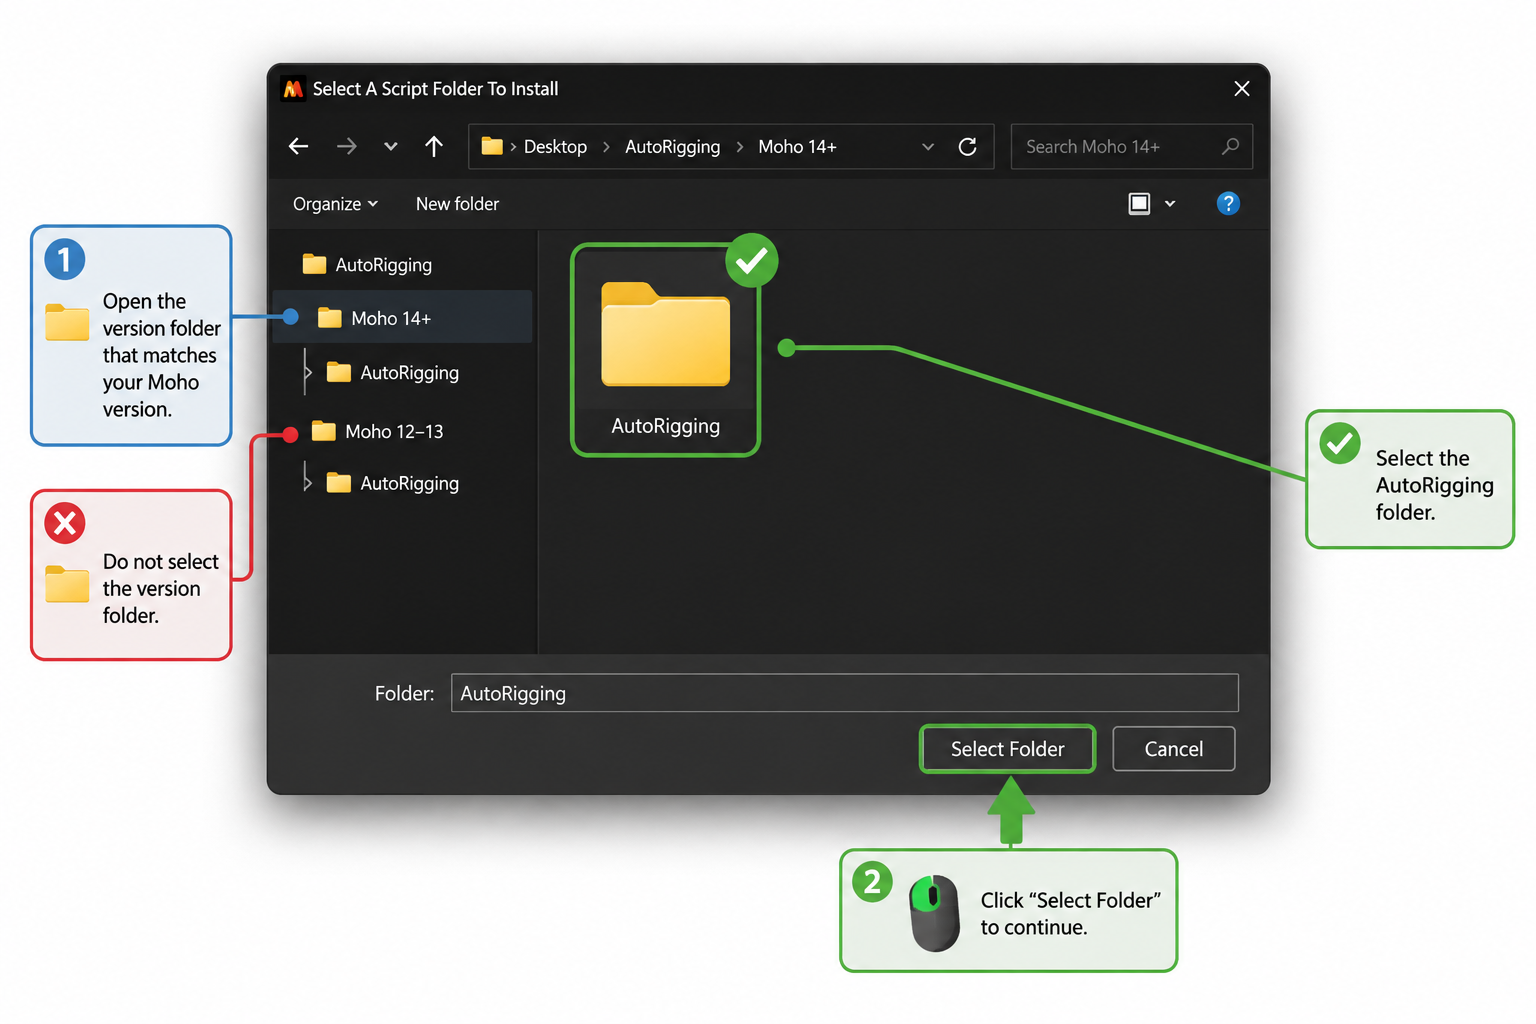
Open the version folder you chose in Step 1, then select the AutoRigging folder inside it.
Important: select the AutoRigging folder itself. Do not select Moho 12–13 or Moho 14+.
Updating AutoRigging? If Moho asks whether you want to replace existing files, choose Overwrite to continue.
Installation Complete
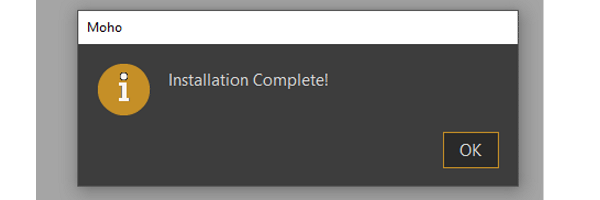
When Moho displays “Installation completed!”, AutoRigging has been installed successfully and is ready to use.
AutoRigging Is Ready.
Installation is complete. Open AutoRigging in Moho and start preparing your character.
Need help?
If you're having trouble installing AutoRigging, contact us and we'll help you.